2021年1月-2月
【Kaggle】 Learn Feature Engineering④
kaggle learn で feature engineeringを勉強するシリーズ第四弾(最終回)。
概要) 特徴量が多すぎるとoverfitします。また、処理も重くなります。なので特徴量を選択する必要があります。
1) Which data to use for feature selection?
Including validation and test data within the feature selection is a source of leakage. You'll want to perform feature selection on the train set only, then use the results there to remove features from the validation and test sets.
2) Univariate Feature Selection
Create the selector with SelectKBest using f_classif as the scoring function. The .fit_transform method will return an array with the best features retained. However, it doesn't retain the column names so you'll need to get them back. The easiest way is to use selector.inverse_transform(X_new) to get back an array with the same shape as the original features but with the dropped columns zeroed out. From this you can build a DataFrame with the same index and columns as the original features. From here, you can find the names of the dropped columns by finding all the columns with a variance of zero.
    # Do feature extraction on the training data only!
    selector = SelectKBest(f_classif, k=40)
    X_new = selector.fit_transform(train[feature_cols], train['is_attributed'])

    # Get back the features we've kept, zero out all other features
    selected_features = pd.DataFrame(selector.inverse_transform(X_new),
                                    index=train.index,
                                    columns=feature_cols)

    # Dropped columns have values of all 0s, so var is 0, drop them
    dropped_columns = selected_features.columns[selected_features.var() == 0]
selectKbestは統計検定を行います。defaultのf_classifを使うと、ANOVA F-valueの上位K個の特徴量をとってきます。また、chi2を使うとChi-squared検定をしてくれます。参考:sklearn.feature_selection.SelectKBest — scikit-learn 0.24.1 documentation
3) The best value of K
To find the best value of K, you can fit multiple models with increasing values of K, then choose the smallest K with validation score above some threshold or some other criteria. A good way to do this is loop over values of K and record the validation scores for each iteration.
上でK=40にしましたが、Kの値を決める方法を考えます。
Kでloopしてvalidation scoreがどう変化するかをよく見ながら、なるべく小さなKの値を決めます。
4) Use L1 regularization for feature selection
L1正規化も特徴量選択に効果的です。
sklearn.feature_selectionのSelectFromModelを使います。
X_newを新しいfeatureとして使用します。
使わない列の値は0になっているので、selected_features.var()!=0でdropします。
First fit the logistic regression model, then pass it to SelectFromModel. That should give you a model with the selected features, you can get the selected features with X_new = model.transform(X). However, this leaves off the column labels so you'll need to get them back. The easiest way to do this is to use model.inverse_transform(X_new) to get back the original X array with the dropped columns as all zeros. Then you can create a new DataFrame with the index and columns of X. From there, keep the columns that aren't all zeros.
    def select_features_l1(X, y):
        logistic = LogisticRegression(C=0.1, penalty="l1", random_state=7, solver='liblinear').fit(X, y)
        model = SelectFromModel(logistic, prefit=True)

        X_new = model.transform(X)

        # Get back the kept features as a DataFrame with dropped columns as all 0s
        selected_features = pd.DataFrame(model.inverse_transform(X_new),
                                        index=X.index,
                                        columns=X.columns)

        # Dropped columns have values of all 0s, keep other columns
        cols_to_keep = selected_features.columns[selected_features.var() != 0]

        return cols_to_keep
5) Feature Selection with Trees
TreeModelだと、feature importancesで特徴量選択を行うことができます。
You could use something like RandomForestClassifier or ExtraTreesClassifier to find feature importances. SelectFromModel can use the feature importances to find the best features.
6) Top K features with L1 regularization
L1のCの値も3)と同様にloopして決めます。
To select a certain number of features with L1 regularization, you need to find the regularization parameter that leaves the desired number of features. To do this you can iterate over models with different regularization parameters from low to high and choose the one that leaves K features. Note that for the scikit-learn models C is the inverse of the regularization strength.
scikit-learnのCでは正規化の逆数であることに注意しましょう。
まとめ)
特徴量選択を行いました。
選択に統計値を利用する場合はselectKbestが便利です。
また、L1 regressionでも特徴量選択を行うことができます。その場合はSelectFromModelを使います。
Tree Modelではfeature importancesで特徴量選択を行うことができます。
【Kaggle】 Learn Feature Engineering③
kaggle learn で feature engineeringを勉強するシリーズ第三弾。
概要) 今回は特徴量の作り方について勉強します。
1) Add interaction features
categoryとcountryの特徴量を組み合わせた特徴量を作ります
The easiest way to loop through the pairs is with itertools.combinations. Once you have that working, for each pair of columns convert them to strings then you can join them with the + operator. It's usually good to join with a symbol like _ inbetween to ensure unique values. Now you should have a column of new categorical values, you can label encoder those and add them to the DataFrame
    cat_features = ['ip', 'app', 'device', 'os', 'channel']
    interactions = pd.DataFrame(index=clicks.index)
    for col1, col2 in itertools.combinations(cat_features, 2):
        new_col_name = '_'.join([col1, col2])

        # Convert to strings and combine
        new_values = clicks[col1].map(str) + "_" + clicks[col2].map(str)

        encoder = preprocessing.LabelEncoder()
        interactions[new_col_name] = encoder.fit_transform(new_values)
特徴量の組み合わせは、for loopとitertools.combinations()を使います。
特徴量の列名は、.joinを使います。"_"でつなぎます。'os_channel'のような列名が作られます。
特徴量の値は、"+"を使います。文字列にするために.map(str)を使います。
0 13_120
1 13_10
2 13_157
3 13_120
4 13_120
のような特徴量が作られます。
Generating numerical features
カテゴリカル特徴量だけでなく、数値特徴量も作ってみましょう。
Pandas Seriesを使います。
2) Number of events in the past six hours
時系列データについては、.rollingという手法を使います
launched.rolling('7d')
を使うと、前の7日間をrollingします。rollingで指定したデータについて、.count()をすることで7日間のデータの中身を数えてくれます。
You can get a rolling time window using .rolling(), but first you need to convert the index to a time series. The current row is included in the window, but we want to count all the events before the current row, so be sure to adjust the count.
    def count_past_events(series):
        series = pd.Series(series.index, index=series)
        # Subtract 1 so the current event isn't counted
        past_events = series.rolling('6h').count() - 1
        return past_events
-1することで現在データを除きます。
3) Features from future information
未来のデータは使わないようにしましょう。
4) Time since last event
.diff()で時間の差分を作ります。
    def time_diff(series):
        return series.diff().dt.total_seconds()
5) Number of previous app downloads
It's likely that if a visitor downloaded an app previously, it'll affect the likelihood they'll download one again. Implement a function previous_attributions that returns a Series with the number of times an app has been downloaded ('is_attributed' == 1) before the current event.
    def previous_attributions(series):
        # Subtracting raw values so I don't count the current event
        sums = series.expanding(min_periods=2).sum() - series
        return sums
series.expandingを使って過去の累積和を計算します。
累積和から現在のデータを引き算するとこれまでの累積和が計算できます。
まとめ)
interaction featuresを作成しました。
カテゴリカル特徴量と数値特徴量それぞれで作成しました。
カテゴリカル特徴量ではitertools.combinationsを使いました。
数値特徴量ではpandasのrollingやdiffを使いました。
leakしないように未来のデータを入れないように注意しましょう。
【Kaggle】Learn Feature Engineering②
Learn Feature Engineering Tutorials | Kaggle
kaggle learn で feature engineeringを勉強するシリーズ第二弾。
今回はカテゴリカルエンコーディングについて。
- Count Encoding
- Target Encoding
- CatBoost Encoding
の取り扱いを勉強します。
使用するライブラリはこちら。
http://contrib.scikit-learn.org/category_encoders/
1) Categorical encodings and leakage
実際に使用する場合は、データセットのうちtrainのみを使い、testやvalidationは使用しません。使用するとleakしてしまうからです。
2) Count encodings
    import category_encoders as ce
    cat_features = ['ip', 'app', 'device', 'os', 'channel']
    train, valid, test = get_data_splits(clicks)

    # Create the count encoder
    count_enc = ce.CountEncoder(cols=cat_features)

    # Learn encoding from the training set
    count_enc.fit(train[cat_features])

    # Apply encoding to the train and validation sets
    train_encoded = train.join(count_enc.transform(train[cat_features]).add_suffix('_count'))
valid_encoded = valid.join(count_enc.transform(valid[cat_features]).add_suffix('_count'))category_encodersから、CountEncoder()を選択したのち、.fitでtrainingデータを学習させ、.transformでencodingします。.add_suffixを使って、_countを列名に付け加えて元のデータセットにjoinします。
3) Why is count encoding effective?
なぜcount encodingが有効なのでしょうか?
希少値は、似たようなカウント(1や2のような値)を持つ傾向があります。そのため、予測時に希少値をまとめて分類することができます。カウントが大きい値は、他の値とカウントが全く同じである可能性が低いです。結局、重要なグループに分類することができます。
4) Target encoding
CountEncoderと同様、TargetEncoderを使用します。.fit時にtargetとなるtrainingデータの列を指定する必要があります。
5) Try removing IP encoding
IPアドレスを除いてencodingするとどうなるでしょうか?同一のIPアドレスごとのデータが少ないので、ノイズが多くなってしまいます。また、testやvalidationでtrainingデータにない新しいIPアドレスを見たとき(これはほとんどの新しいデータであると思われます)モデルのパフォーマンスは非常に悪くなります。したがって、IPアドレスを除外するほうが成績はよくなることが予想されます。
6) CatBoost Encoding
CountEncoderと同様、CatBoostEncoderを使用します。.fit時にtargetとなるtrainingデータの列を指定する必要があります。5)で予想した通り、validation AUC scoreがさらに高くなりました。
まとめ)
category_encodersという便利なライブラリーを使用しました。
count encodingがなぜ有効かを勉強しました。
IPアドレスのような値を入れてしまうと、testやvalidationには汎化しにくいことを学びました。
leakしないようにtrain datasetのみで.fitすることに注意しましょう。
【Kaggle】Learn Feature Engineering①
Learn Feature Engineering Tutorials | Kaggle
kaggle learn で feature engineeringを勉強するシリーズ第一弾
1) Construct features from timestamps
.dt.hour.astype('uint8')を使うと、pandas形式のタイムスタンプを時間(hour)の特徴量に変換することができる。
 # Split up the times
    click_times = click_data['click_time']
    clicks['day'] = click_times.dt.day.astype('uint8')
    clicks['hour'] = click_times.dt.hour.astype('uint8')
    clicks['minute'] = click_times.dt.minute.astype('uint8')
    clicks['second'] = click_times.dt.second.astype('uint8')
2) Label Encoding
scikit-learnのpreprocessing.LabelEncoderから、.fit_transform methodを使うと、categorical featureをlabel encodingすることができる。
    label_encoder = preprocessing.LabelEncoder()
    for feature in cat_features:
        encoded = label_encoder.fit_transform(clicks[feature])
        clicks[feature + '_labels'] = encoded
どちらも知らなかったのでとても勉強になりました。
2021年の目標
・ブログ記事を週1
・kaggleでメダルを取る
・論文を2本出す
ゆるゆるやっていきます。
Deep Learningを使ったキルミーベイベーアイコン686枚によるキルミーベイベー的な画像分類
Abstract
でLabellioを知りました。今回は、アニメ「キルミーベイベー」のアイコン686枚*1を用いて、キルミーベイベーとカガクチョップその他の画像分類を行いました。その結果、顔が写っていないやすなをやすなだと認識させることに成功しました。
Introduction
キルミーベイベーはカヅホ先生原作の4コマ漫画である。2012年にアニメ化された。現在原作は7巻まで。2013年発売のキルミーベイベー・スーパーにOVAが収録された。熱狂的なファンによって2期が待望されている。
また、カヅホ先生による、カガクチョップという漫画も連載中である。声優、赤崎千夏と田村睦心の意表をついた起用により、CMが話題になっている。
Methods
今回用いたデータセットでは、やすな、ソーニャ、あぎり、やすなとソーニャ、没キャラ、その他の6つのクラスを作りました。作成の仕方は、以下のように画像をフォルダに入れて、フォルダをまとめてzipファイルを作りました。分類では686枚のアイコンをじっくり鑑賞することができました。

例えば、やすなとソーニャのフォルダの中身は以下のようになりました。なお、にせやすなはやすなの分類にしました。

あぎりさんともう一人以上いるパターン、かぼちゃあぎりさんは今回の6クラスに入らないと判断したため使いませんでした。

Labellioでtrainingしました。途中でバグが発生しましたが、きっと私が原因ではないと信じています。迅速な対応をしていただきました。以下がtraining後の結果です。
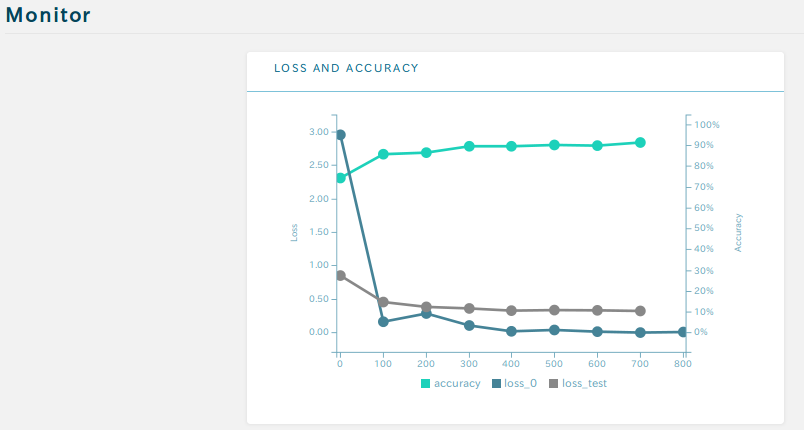
90%程度の精度で分類ができると考えられます。データセットを増やすことでまだ精度が上昇することが期待されます。なので2期をお願いします。
Results and Discussion
まずはキルミーベイベー的非キルミーベイベー画像の分類を行いました。
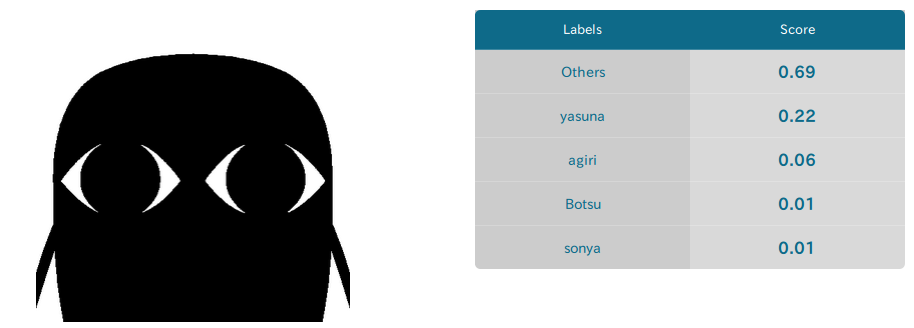
まずはカヅホ先生のアイコンを分類しました。69%でその他に分類されています。22%でやすならしいです。
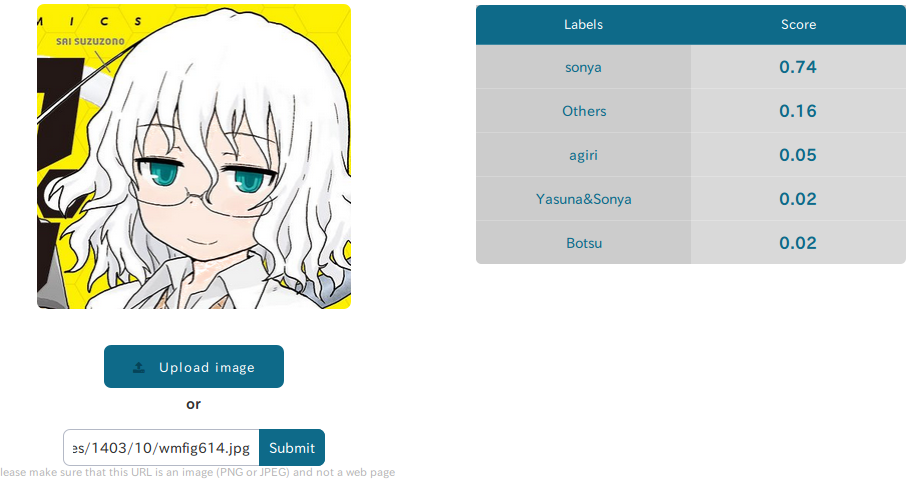
次に、カガクチョップの鈴園沙衣を分類しました。予想通りソーニャに74%で分類されました。セオリー通りだと、声優はソーニャ役の田村睦心さんですが、CMではやすな役の赤崎千夏さんが起用され、われわれと人工知能の予想を裏切ったということになります。
カガクチョップの長倉蓮も分類しました。44%でやすなです。CMではソーニャ役の田村睦心さんが起用されました。ソウダッター!!
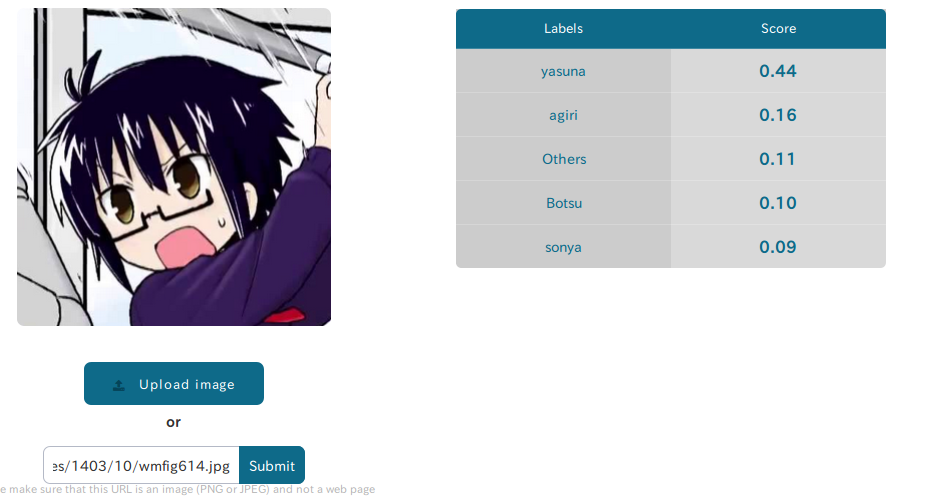
最後に、キルミーベイベーの画像分類を行いました。
まずは原作のやすなを分類しました。93%という高精度でやすなと分類されています。しっかりキャラの書き分けができているということが分かりました。

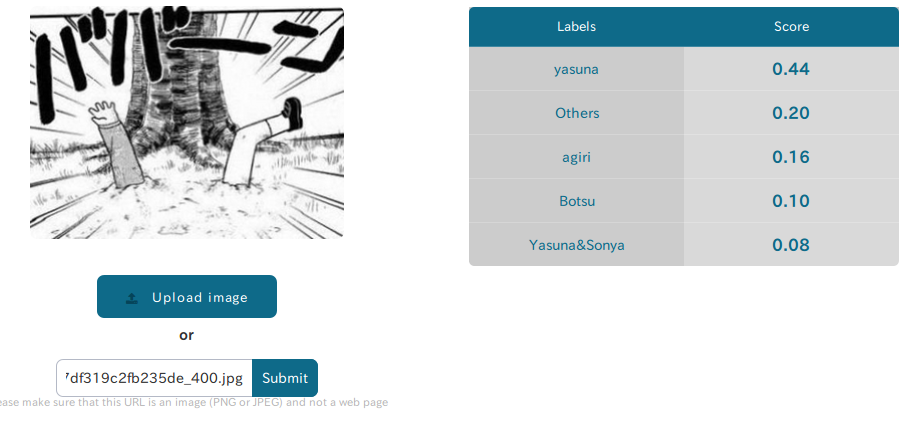
続いて、再度原作のやすなを分類しました。こんなのでもやすなだと分類して、正直驚きました。手と足の位置がやすなの特徴量になっている可能性が考えられます。感動しなかったら木の下に埋めてもらっても構わないよ。ババーン
Future works
ディープラーニングでやすな細胞を発見したい。
感想
予想を遥かに上回る容易さでディープラーニングができました。小学生の夏休みの自由研究などに、いろいろな画像セットを作って実験してみてはいかがでしょうか。
予想以上に686枚の画像セットが優秀だったので驚きました。かぼちゃあぎりさんを除外する必要がなかったような気もしてきたので、そこら辺も深く考えるべく、ぜひキルミーベイベー2期をよろしくお願いいたします。
追記
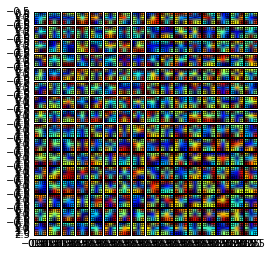
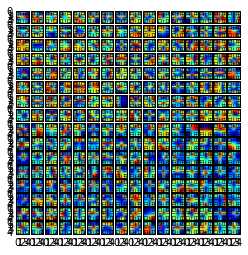
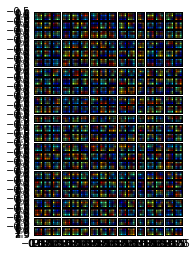
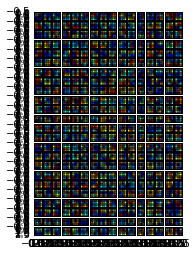
Labellioのネットワークレイヤー。
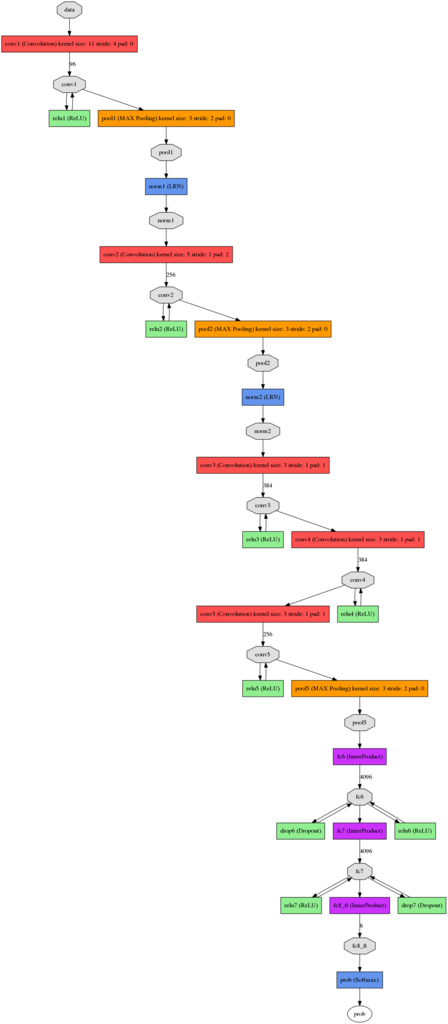
畳み込み層。これ他のモデルでも同じになるけれど正しいのだろうか?
追記:肉眼で分からないレベルで違うらしい
conv1
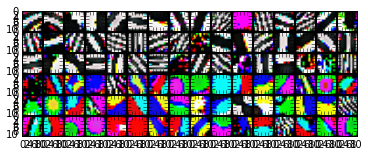
conv2
conv3
conv4
conv5
